First things first:
- Distinguish between numbered and bulleted lists.
- Use the Tab key to create a new list level effortlessly.
- Use lists for your headings.
Bullet points and numbered lists are essential tools for structuring content. Even a table of contents would look far less organized without this handy function. However, automatic numbering can sometimes be a bit stubborn. We’ll guide you through defining list entries correctly, so you can work with them seamlessly.
All tips provided here apply to the latest versions of Microsoft Word included in Office 365 and Office 2019.
Simple and Efficient: Basic Bullet Points
Creating bulleted lists is the easiest option. Begin by writing your list entries one by one, each separated by a paragraph break. Then, highlight the entire list and go to the “Home” tab under “Paragraph” to select the desired list format. On the far left, you’ll find the simple, non-numbered bullet point option.

Clicking this button will convert the highlighted text into a standard list. If you click the small arrow on the right, you can choose your preferred bullet style.
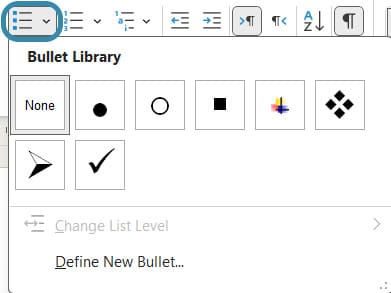
Be sure to add further list entries by pressing the Enter key. If you use a manual (soft) line break (Shift + Enter), no new bullet point will appear, and your list entry will continue on a new line instead. Here’s the difference:

To create a sub-point within a list, simply indent using the Tab key. Alternatively, you can specify the level for the selected paragraph in the list menu under “Change List Level.” The symbol used for sublevels can also be selected via the dropdown menu while a corresponding list level is active.
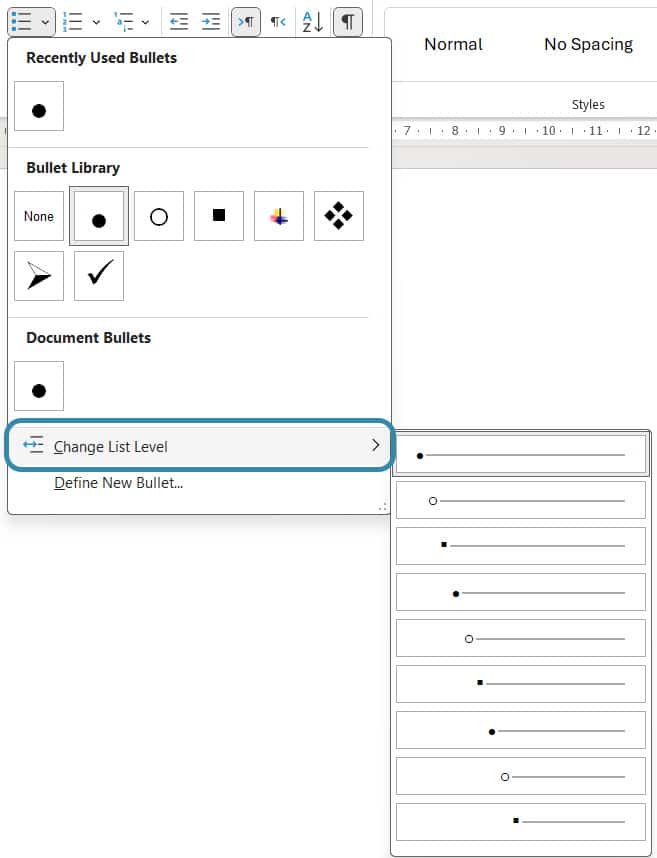
If you prefer custom bullet points, you can define a new symbol directly in this menu—start your lists with @ or #, for instance.
If you select all list entries and apply the "Keep lines together" option in the paragraph menu, you’ll prevent page breaks within individual points. This ensures no single line of a list ends up on a new page. However, this might push an entire entry to the next page, leaving considerable blank space depending on its length. Therefore, consider this option only for short lists with three or four single-line entries.
GRIN Tip: Keep Lists Together
Troubleshooting Numbered Lists
The procedure described also works with numbering. A simple click on the “Numbering” button will number your list entries in number format 1st, 2nd, 3rd, etc.

Just like bullet points, you can choose from various templates, adjust the list level, define a custom numbering format, or set the starting value if your list doesn’t begin with 1 or a).
For multi-level lists, each entry will be indented and automatically shifted down a level with a press of the Tab key.
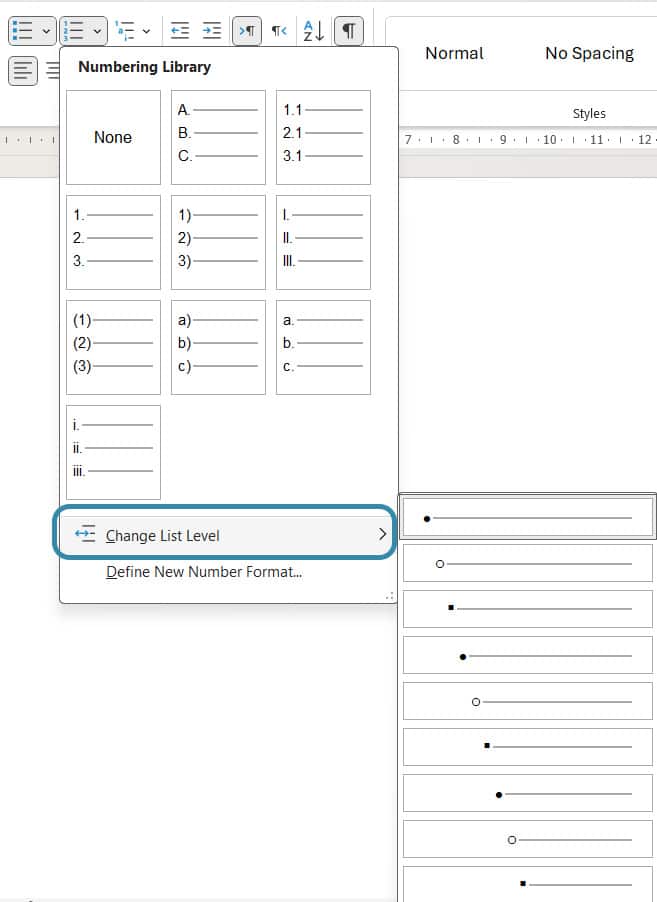
The “Multilevel List” button works similarly. Unlike simple numbered or bulleted lists, it will prompt you to select a format for your list immediately.
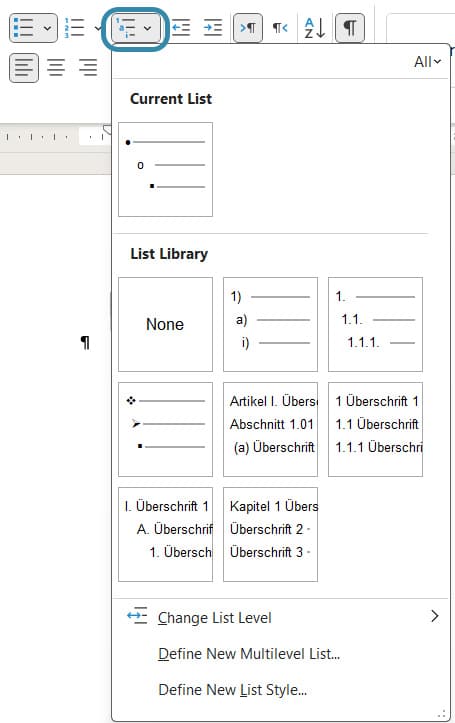
You can start with the default format and customize it later by right-clicking on the numbering and selecting “Adjust List Indents.”
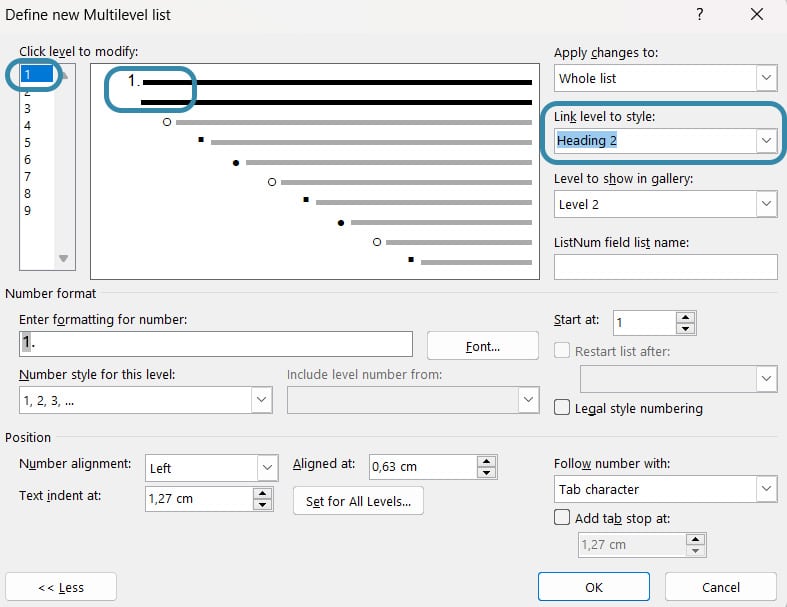
This opens the “Define New Multilevel List” window. Clicking “More” in the lower left reveals the full view.
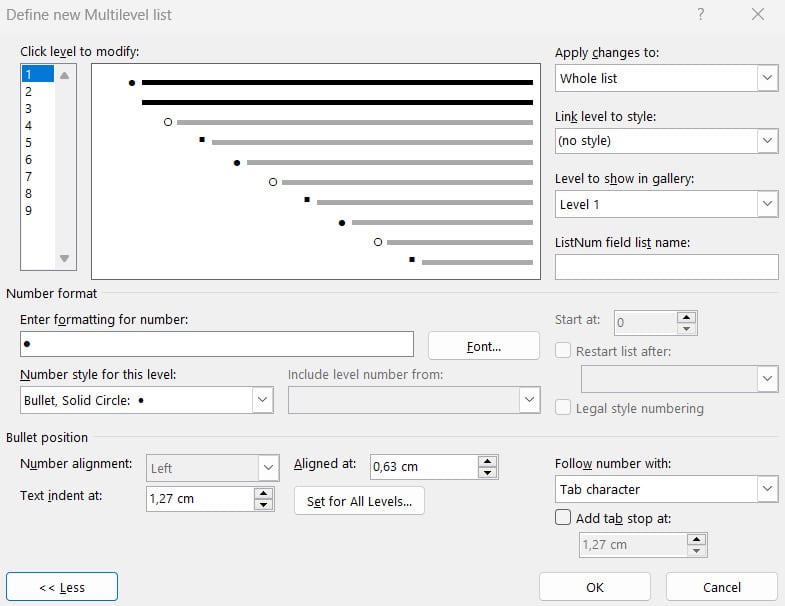
Here you can:
- Select the list level to modify, either from the menu or by clicking the preview.
- Specify the format for the chosen level, e.g., adding “Chapter” before the numbering.
- Choose a numbering style, such as 1,2,3 or a,b,c.
- Alternate numbers, letters, and symbols for different levels by selecting from the dropdown menu.
- Decide whether to include the preceding level’s number, so Level 2 could be numbered “I.1, I.2, I.3” or simply 1, 2, 3.
- Adjust layout options like text indentation and spacing between the number and text in the “Position” section.
- Link a list level to a style, which automatically applies numbering to that style—useful for headings.
Click “OK” to confirm changes. To reuse your custom multilevel list, save it to the list library via the dropdown menu for quick access later. A well-formatted list ensures consistency throughout your work.
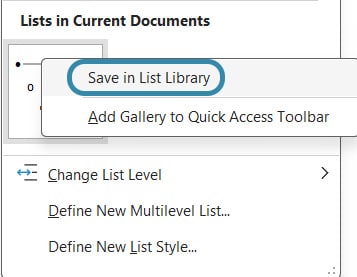
To automatically number your headings, you first simply define a new list with several levels. Choose the numbering you like as described above, then link the first layer of the list to Heading 1, the second layer to Heading 2, and so on. Alternatively, you may already have a suitable heading numbering saved in the list library as a template. You can simply click on them while selecting a heading of any layer, and all headings will be automatically numbered. You can still adjust the numbering as described above via the "List Entry" option. If you want a single heading without numbering, e.g. for the abstract or the dedication, simply delete the automatically inserted numbering afterwards.
GRIN Tip: Automatically Number Headings
You can find more tips on how to use Word: GRIN tips for Word
Do you need help formatting your text?
We’re here to help! With our premium services, you can give your text a professional layout. We will be happy to advise you personally at premium@grin.com.
Frequently asked questions
Select the text, go to “Paragraph” in the “Home” tab and select the desired bullet point. Press Enter to add more list entries.
Click the “Numbering” button in the “Paragraph” tab. To change the list level, use the Tab key or adjust the numbering via “Adjust List Indents.”
Define a new multilevel list and link the levels to the styles “Heading 1,” “Heading 2,” etc. The numbering will then be applied automatically.
Do you like our magazine? Then sign up for our GRIN newsletter now!
