Zum Warenkorb
Zum Warenkorb
Welcome to GRINspiration, the online magazine for students! Here, you'll find everything you won't learn in class: tips and tricks for writing and formatting your papers, study aids, and quick summaries on topics that keep popping up throughout your studies.
You are here: Magazine How to Use Styles in Word Correctly
All articles
bild von einem jungen mann der mit den fingern einen rahmen bildet grin |
17. August 2022 • Reading duration: 5 Min

How to Use Styles in Word Correctly

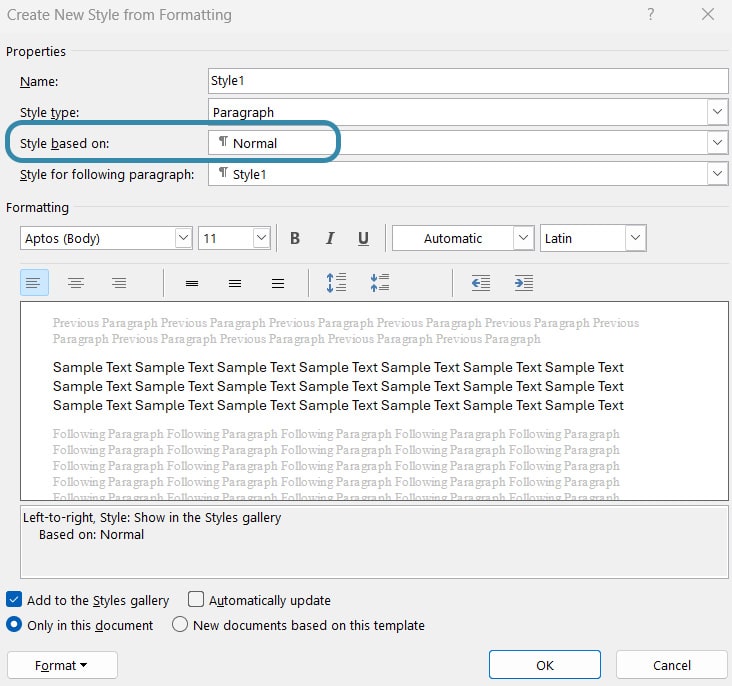
Styles are a practical tool for academic writing—if used correctly. Here, you'll find all the tips and tricks.

First things first:

  • Styles save you time and effort.
  • Styles allow you to apply a combination of formatting options to a document.

Without styles, writing and formatting an academic paper would be tedious and time-consuming: you would have to manually adjust each heading and citation, create the table of contents by hand, and start all over again if you decided to use a different font. But with Word’s styles, none of that is necessary! Styles are automated and ensure a consistent layout. You can find them in the “Home” menu under “Styles.”

word styles grin |

What are styles?

Styles are combinations of formatting settings—for example, a mix of font type, font size, line spacing, etc. When you apply a style to a normal text paragraph, it automatically adopts the formatting defined by that style. This ensures that all paragraphs with the same style share a uniform appearance. To display elements like quotations or headings in distinct layouts, you can create multiple styles. For example, one style can be used for quotations and another for headings.

Styles, however, can do much more! They also contain information about the type of text they are applied to. If you mark first-level headings with the style “Heading 1,” second-level headings with “Heading 2,” and so on, Word knows where the headings are located in your text. This enables you to create an automatic table of contents.

How do I apply a style?

Styles are always applied to entire paragraphs. By default, every paragraph starts with the “Normal” style, which should be used for your main body text. To mark a heading, place the cursor anywhere in the heading text or highlight it, then select “Heading 1” (or another level) from the menu. The new style will be instantly applied to the selected text. The same process works if you want to format a paragraph as a standalone quotation. Depending on the width of your screen, you may not see all styles at a glance. You can access the full list by clicking the arrows next to the styles in the menu:

grin |

How do you edit a style?

Have you looked at Word’s styles before but didn’t like the default formatting? For instance, the default setting for headings is often blue. These presets can be easily adjusted. Click on the small arrow below the styles to open a dedicated menu:

word styles grin |

Here, you’ll see a small arrow next to each style. Clicking it will open the menu for that specific style. Select “Modify” to adjust settings like the font type, add numbering to headings, or indent quotations.

word modify styles grin |

You can make these changes at any time. If you configure everything at the beginning, your document will immediately have the desired appearance. However, if you modify a style during or after writing, the new layout will still be applied to every paragraph that uses that style. This can save you significant time, especially if you decide to tweak heading sizes at the end.

For more styling tricks, check out our article Faster formatting in Word: 3 simple tips.

Create custom styles

You’re not limited to Word’s default styles—you can also create your own. The easiest way is to build on an existing style. For example, you might want to italicize some quotations while keeping all other formatting the same as your standard quote style. In this case, use the “New Style” button to create your custom style and give it a name:

word new style grin |

Then, under “Style Based On,” select the existing style—such as “Quote”—as the template. Make your adjustments and save your new style by clicking “OK.”

word new style grin |

Assigning shortcuts to styles

Do you want to format your text even faster? Define custom keyboard shortcuts to apply styles to selected text. Some styles already have default shortcuts. For a full overview, see our article: Faster formatting in Word: 3 simple tips.

If you’ve created a custom style or frequently use a style that doesn’t have a shortcut yet, you can assign one yourself. Open the “Options” menu under “File” (bottom-left corner) and customize the ribbon. At the bottom, you’ll find the option to set up keyboard shortcuts:

word add new shortcuts grin |

However, be careful not to overwrite existing shortcuts

Creating an automatic table of contents

If you’ve marked all your headings with the appropriate styles, you can use them to generate an automatic table of contents. Go to “References” and select “Table of Contents.” An automated table of contents is easy to update, and you’ll never have to worry about incorrect page numbers again.

By now, you’re probably just as excited about styles as we are at the GRIN editorial team! For more helpful tips on academic writing with Microsoft Word, check out our magazine: https://www.grin.com/en/magazin/word-formatting/

Do you like our magazine? Then sign up for our GRIN newsletter now!